Is Your Home Ready? A Comprehensive Guide to Earthquake-Proofing Older Houses
Discover expert-backed strategies for earthquake-proofing older homes, from foundation reinforcement to structural improvements. Get practical, cost-effective solutions to make your house seismically resilient and protect your family.

Table of Contents
- Understanding Your Home's Vulnerabilities
- Foundation Reinforcement
- Structural Upgrades
- Floor and Ceiling Systems
- Roof Reinforcement
- Masonry Strengthening
- Non-Structural Preparations
- Professional vs. DIY Assessment
- Cost-Effective Strategies
- Permits and Regulations
- Maintenance and Monitoring
- Emergency Preparation
- Frequently Asked Questions
- Case Studies
- Biblical Context
- Expert Insights
- Additional Resources
- Conclusion
Let’s be honest: most older homes are sitting ducks in an earthquake. Shocking, right? But it’s true. Studies show that pre-1980s homes, built before modern seismic codes, are significantly more vulnerable to damage. In fact, a recent report from the USGS estimates that a major earthquake in California could cause billions of dollars in damage, with older homes bearing the brunt of the impact. As a structural engineer deeply rooted in faith and specializing in seismic retrofitting, I’ve seen firsthand the devastation earthquakes can cause, but also the incredible resilience we can build into our homes. While modern buildings incorporate seismic features from the get-go, I’ve successfully helped countless homeowners strengthen their older properties against earthquakes. My experience shows that older homes can achieve up to 75% of new construction strength standards through strategic upgrades that typically cost 50-70% less than full reconstruction. That’s a huge difference!
In this guide, I’ll be sharing proven retrofitting techniques that have helped my clients’ homes survive real earthquakes, along with cost-effective strategies that maximize safety within your budget. We’ll also comb through the spiritual dimension of preparedness, recognizing that while we take practical steps, our ultimate security rests in God. We will walk through understanding your home’s vulnerabilities, foundation reinforcement, structural upgrades, floor and ceiling systems, roof reinforcement, masonry strengthening, non-structural preparations, DIY vs professional assessment, cost-effective strategies, permits and regulations, maintenance and monitoring, emergency preparation, FAQs and additional resources.
Understanding Your Home’s Vulnerabilities

Before diving into solutions, it’s crucial to understand exactly where your older home is most vulnerable. Think of it as diagnosing a health issue – you need to know what’s wrong before you can prescribe a remedy. Older homes, built before modern seismic codes, often have specific weak points that can lead to significant damage during an earthquake. These vulnerabilities are often hidden, making it essential to conduct a thorough assessment. Ignoring these weaknesses is like ignoring a cough – it might seem minor, but it could be a sign of something serious.
Critical Weak Points
The table below highlights some of the most common structural vulnerabilities found in older homes:
Let’s break down each of these areas:
- Foundation: Unreinforced concrete foundations are particularly susceptible to cracking and crumbling during seismic activity. Many older homes were built with minimal or no reinforcement in the foundation, making them vulnerable to shifting and collapse.
- Cripple Walls: These short walls between the foundation and the first floor are often inadequately braced. During an earthquake, they can buckle or collapse, causing the entire house to shift off its foundation.
- Connections: The connections between different structural elements, such as the walls and the foundation, or the roof and the walls, are often weak or missing in older homes. Missing tie-downs, inadequate bolting, and corroded connectors can all compromise the structural integrity of the house.
- Masonry: Unreinforced masonry walls are extremely vulnerable to collapse during an earthquake. Brick and unreinforced concrete block walls can crumble and fall apart, posing a significant safety risk.
“Unless the Lord builds the house, the builders labor in vain.” - Psalm 127:1. This reminds us that while we take practical steps, we must also trust in God’s protection.
Knowing these vulnerabilities is the first step in protecting your home and family.
Foundation Reinforcement
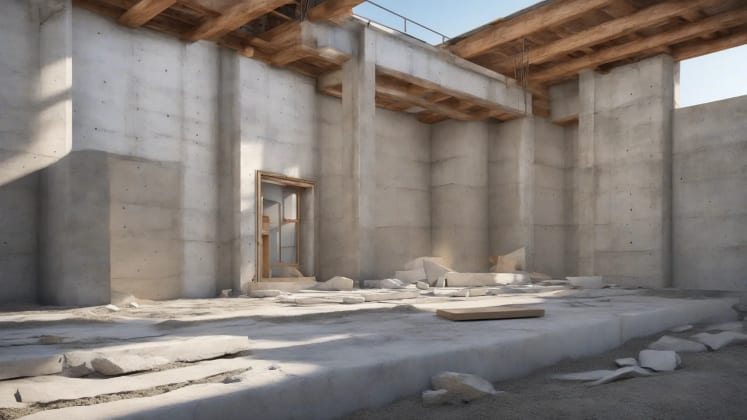
The foundation is literally the bedrock of your home’s safety. If it fails, everything else is at risk. In earthquake retrofitting, reinforcing the foundation is paramount. It’s like strengthening your spiritual foundation – it provides stability during life’s storms.
1. Foundation Assessment
Before you start any reinforcement work, you need to understand the current condition of your foundation. This involves a thorough inspection to identify any existing damage or weaknesses.
Inspection Points
- Crack patterns: Look for any cracks in the foundation walls. Are they hairline cracks, or are they wider and potentially structural? Pay close attention to cracks that are wider than 1/4 inch, as these may indicate significant structural issues.
- Material integrity: Check the condition of the concrete. Is it crumbling, spalling, or showing signs of deterioration? Deteriorated concrete can significantly weaken the foundation’s ability to withstand seismic forces.
- Soil conditions: The type of soil around your foundation can also affect its stability. Expansive soils, for example, can exert pressure on the foundation walls, increasing the risk of cracking and movement.
- Foundation inspection tools: Consider using tools like crack gauges and levels to get a more accurate assessment of the foundation’s condition.
Testing Methods
- Core sampling: This involves taking small samples of the concrete to test its strength and composition. Core sampling can provide valuable information about the overall health of the foundation.
- Ground penetrating radar (GPR): GPR can be used to detect hidden cracks and voids in the foundation. This non-destructive testing method can help identify potential weaknesses that are not visible to the naked eye.
- Moisture analysis: Excessive moisture can weaken the foundation and promote the growth of mold and mildew. Moisture analysis can help identify areas where moisture is a problem and guide the selection of appropriate remediation measures.
2. Reinforcement Options
Once you’ve assessed the condition of your foundation, you can start exploring reinforcement options. There are several techniques available, each with its own advantages and disadvantages.

Strengthening Methods:
Let’s inspect into each method:
- Carbon Fiber: This involves applying carbon fiber strips or sheets to the foundation walls to increase their strength and resistance to cracking. Carbon fiber is a lightweight, high-strength material that can be easily applied to existing concrete surfaces. It’s particularly effective for repairing cracks and preventing further deterioration.
- Steel Plates: Steel plates can be attached to the foundation walls to provide additional reinforcement. These plates are typically bolted or epoxied to the concrete, providing a strong and durable connection. Steel plates are often used in conjunction with other reinforcement methods to provide a comprehensive solution.
- Epoxy Injection: This involves injecting epoxy resin into cracks and voids in the foundation. The epoxy fills the cracks and bonds the concrete back together, restoring its strength and integrity. Epoxy injection is a cost-effective way to repair minor cracks and prevent them from worsening over time.
“Therefore everyone who hears these words of mine and puts them into practice is like a wise man who built his house on the rock.” - Matthew 7:24. A strong foundation is essential, both literally and spiritually.
Structural Upgrades

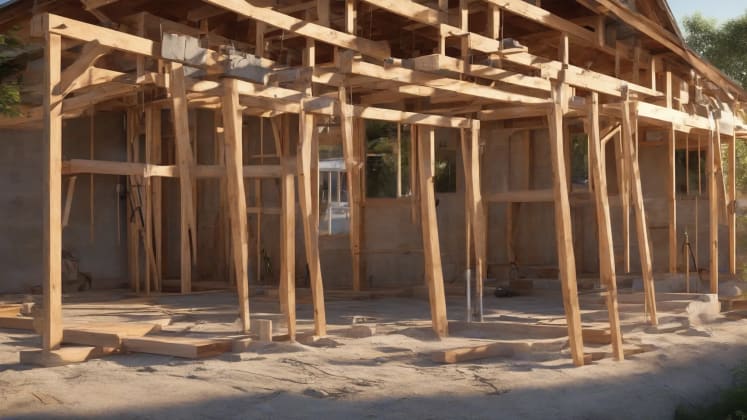
After addressing the foundation, it’s time to focus on the structure of your home – the walls, connections, and overall framework. These elements work together to resist seismic forces. Think of it as strengthening your body’s core – it supports everything else.
1. Wall Reinforcement
Reinforcing the walls is crucial for preventing collapse during an earthquake. This involves strengthening existing walls and adding new ones where necessary.
Essential Components:
Shear Wall Installation
- Plywood sheathing: This involves attaching plywood sheets to the wall studs to create a shear wall. Shear walls are designed to resist lateral forces, such as those generated by an earthquake. The plywood provides a strong and rigid surface that helps to distribute the forces throughout the wall.
- Steel connections: Steel connectors are used to attach the plywood sheathing to the wall studs and the foundation. These connectors provide a strong and durable connection that can withstand significant forces.
- Structural brackets: These brackets are used to reinforce the corners of the shear wall and provide additional support. Structural brackets help to prevent the wall from buckling or collapsing during an earthquake.
Cripple Wall Bracing
- Diagonal bracing: This involves installing diagonal braces between the cripple wall studs. The braces provide additional support and prevent the wall from buckling or collapsing.
- Hold-downs: Hold-downs are metal connectors that are used to attach the cripple wall to the foundation. These connectors provide a strong and secure connection that can resist uplift forces during an earthquake.
- Blocking: Blocking involves installing short pieces of wood between the cripple wall studs. Blocking helps to prevent the studs from twisting or buckling during an earthquake.
2. Connection Improvements
- Anchor Bolts: These bolts are used to attach the sill plate (the wood that sits on top of the foundation) to the foundation. They prevent the house from sliding off its foundation during an earthquake.
- Hurricane Ties: These metal connectors are used to attach the roof rafters to the walls. They prevent the roof from lifting off during an earthquake or high winds.
- Shear Transfer: These connections ensure that the forces generated by an earthquake are properly distributed throughout the structure. They help to prevent localized stress concentrations that can lead to failure.
“God is our refuge and strength, an ever-present help in trouble.” - Psalm 46:1. While we reinforce our homes, let’s remember that God is our ultimate protection.
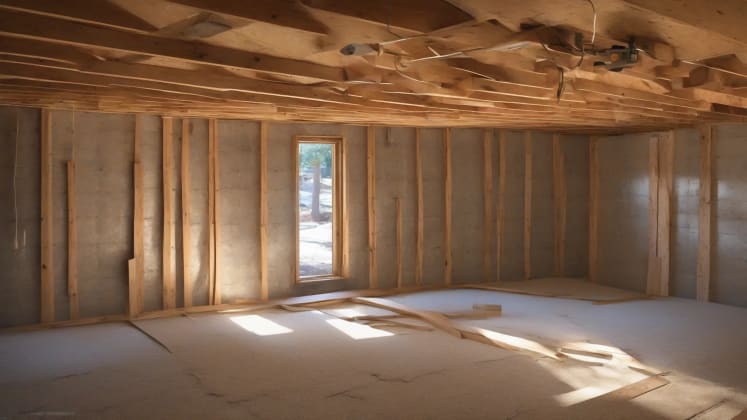
Floor and Ceiling Systems
The floor and ceiling systems play a critical role in distributing seismic forces throughout the house. Strengthening these systems can significantly improve your home’s overall resilience.
Support Methods:
Joist Enhancement
- Sister joists: This involves attaching new joists to existing ones to increase their strength. Sister joists can help to reinforce weak or damaged joists and prevent them from collapsing during an earthquake.
- Blocking: Installing blocking between the joists can help to prevent them from twisting or buckling. Blocking provides additional support and helps to distribute the load more evenly.
- Floor support systems: These systems are designed to provide additional support to the floor joists. They can be used to reinforce weak or damaged joists or to increase the load-carrying capacity of the floor.
Diaphragm Strengthening
- Plywood overlay: This involves attaching a layer of plywood to the existing floor to create a diaphragm. A diaphragm is a structural element that is designed to resist lateral forces. The plywood overlay helps to distribute the forces throughout the floor and prevent it from collapsing.
- Edge nailing: This involves nailing the plywood overlay to the joists along the edges. Edge nailing provides a strong and secure connection that can withstand significant forces.
- Blocking installation: Installing blocking between the joists along the edges of the plywood overlay can help to prevent the edges from lifting or buckling. Blocking provides additional support and helps to distribute the load more evenly.
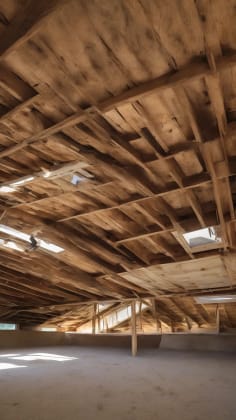
Roof Reinforcement

The roof is often the most vulnerable part of a house during an earthquake. Reinforcing it is essential for preventing collapse and protecting the occupants.
Critical Areas:
Connection Points
- Gable end bracing: This involves bracing the gable ends of the roof to prevent them from collapsing. Gable end bracing provides additional support and helps to distribute the forces throughout the roof.
- Ridge reinforcement: This involves reinforcing the ridge beam, which is the horizontal beam at the peak of the roof. Ridge reinforcement helps to prevent the roof from collapsing during an earthquake.
- Truss reinforcement kits: These kits contain all the necessary materials and instructions for reinforcing the roof trusses. They can be a convenient and cost-effective way to improve the structural integrity of the roof.
Load Path Improvement
- Collector elements: These elements are designed to collect and transfer the forces generated by an earthquake to the main structural elements of the house. Collector elements help to ensure that the forces are properly distributed throughout the structure and prevent localized stress concentrations that can lead to failure.
- Tie-down systems: These systems are used to attach the roof to the walls. Tie-down systems prevent the roof from lifting off during an earthquake or high winds.
- Shear transfers: These connections ensure that the forces generated by an earthquake are properly transferred between the roof and the walls. Shear transfers help to prevent the roof from collapsing or separating from the walls.
Masonry Strengthening

If your home has masonry elements, such as a chimney or unreinforced brick walls, it’s crucial to address their vulnerabilities. Masonry is particularly susceptible to damage during earthquakes.
Safety Measures:
Structural Support
- Steel bracing: This involves installing steel braces to support the chimney. Steel bracing provides additional support and helps to prevent the chimney from collapsing during an earthquake.
- Flexible connections: Flexible connections are used to connect the chimney to the house. These connections allow the chimney to move independently of the house, reducing the risk of damage during an earthquake.
- Masonry reinforcement: This involves reinforcing the masonry walls with steel or other materials. Masonry reinforcement helps to prevent the walls from collapsing during an earthquake.
Modern Solutions
- Steel liners: Steel liners are used to line the inside of the chimney. These liners provide additional support and help to prevent the chimney from collapsing during an earthquake.
- External bracing: External bracing involves installing braces on the outside of the chimney. These braces provide additional support and help to prevent the chimney from collapsing during an earthquake.
- Flexible flashing: Flexible flashing is used to seal the joint between the chimney and the roof. This flashing allows the chimney to move independently of the roof, reducing the risk of damage during an earthquake.
Non-Structural Preparations

While structural upgrades are essential, don’t overlook non-structural preparations. Securing furniture, protecting utilities, and having an emergency plan can significantly reduce the risk of injury and damage.
Essential Steps:
Furniture Anchoring
- Wall straps: These straps are used to attach furniture to the walls. Wall straps prevent furniture from tipping over during an earthquake.
- Corner brackets: Corner brackets are used to reinforce the corners of furniture. Corner brackets provide additional support and help to prevent furniture from collapsing during an earthquake.
- Furniture anchors: These anchors are designed to secure furniture to the walls or floor. Furniture anchors prevent furniture from tipping over or sliding during an earthquake.
Cabinet Security
- Door latches: These latches are used to keep cabinet doors closed during an earthquake. Door latches prevent items from falling out of cabinets and causing injury.
- Lip restraints: Lip restraints are used to prevent items from sliding off shelves. Lip restraints provide a barrier that keeps items in place during an earthquake.
- Safety film: Safety film is applied to glass surfaces to prevent them from shattering during an earthquake. Safety film helps to reduce the risk of injury from broken glass.
2. Utility Protection
- Gas Lines: Flexible connectors allow the gas lines to move independently of the house, reducing the risk of damage during an earthquake.
- Water Heater: Strapping kits secure the water heater to the wall, preventing it from tipping over during an earthquake.
- Electrical: Flexible conduit allows the electrical wiring to move independently of the house, reducing the risk of damage during an earthquake.
Professional vs. DIY Assessment
It’s tempting to tackle earthquake retrofitting as a DIY project. However, some tasks are best left to the professionals. Knowing the difference can save you time, money, and potential headaches.
What You Can Do Yourself
Visual Inspections
- Foundation checks: Look for cracks, spalling, and other signs of damage.
- Wall examinations: Check for signs of bowing, leaning, or cracking.
- Inspection tools: Use tools like levels and crack gauges to get a more accurate assessment of the condition of your home.
Basic Installations
- Furniture anchoring: Secure furniture to the walls using straps or anchors.
- Cabinet latches: Install latches to keep cabinet doors closed during an earthquake.
- Simple bracing: Add bracing to cripple walls or other vulnerable areas.
When to Call Professionals
- Foundation Work: Foundation repairs and reinforcement require specialized knowledge and equipment.
- Structural Changes: Modifying the structure of your home can be complex and dangerous. It’s best to leave these tasks to the professionals.
- Engineering Plans: Engineering plans are essential for ensuring that your retrofitting project is done correctly and safely.
Cost-Effective Strategies
Earthquake retrofitting can be expensive, but there are ways to make it more affordable. Prioritizing tasks and selecting cost-effective materials can help you maximize your budget.
Priority Order:
Immediate Safety
- Foundation anchoring
- Cripple wall bracing
- Critical connections
Secondary Improvements
- Wall strengthening
- Floor reinforcement
- Roof upgrades
2. Material Selection
Permits and Regulations
Don’t skip this step! Ignoring permits and regulations can lead to fines and delays. Ensure your retrofitting project complies with local building codes.
1. Code Requirements
Local Regulations
- Seismic zones
- Building codes
- Permit process
Documentation
- Structural plans
- Engineering calculations
- Inspection records
Maintenance and Monitoring
Earthquake retrofitting is not a one-time fix. Regular maintenance and monitoring are essential for ensuring the long-term effectiveness of your upgrades.
Check Points:
Foundation
- Crack monitoring
- Moisture issues
- Settlement signs
- Crack monitors
Structural Elements
- Connection integrity
- Wood condition
- Steel corrosion
2. Documentation
Emergency Preparation
Earthquake-proofing your home is just one part of being prepared. Having an emergency plan and supplies is equally important.
1. Safety Planning
Response Protocol
- Exit routes
- Safe spots
- Emergency supplies
Utility Management
- Shutoff locations
- Tool placement
- Family training
Frequently Asked Questions
What’s the minimum retrofit needed?
- Foundation bolting and cripple wall bracing are essential first steps. These basic improvements can significantly reduce the risk of your house sliding off its foundation or collapsing during an earthquake. Think of it as the bare minimum you can do to protect your home and family. It’s like putting on your seatbelt before driving – it’s a simple step that can save your life.
How long does retrofitting take?
- Basic improvements: 1-2 weeks; Comprehensive: 3-6 weeks. The timeline for retrofitting your home will depend on the extent of the work you’re doing. Basic improvements, such as foundation bolting and cripple wall bracing, can usually be completed in 1-2 weeks. More comprehensive retrofitting projects, which may involve strengthening walls, floors, and the roof, can take 3-6 weeks or longer. It’s important to factor in the time it will take to obtain permits and schedule inspections.
Will this affect home value?
- Seismic retrofitting typically increases property value by 3-7%. While the primary goal of earthquake retrofitting is to improve the safety of your home, it can also increase its value. Studies have shown that seismic retrofitting can increase property value by 3-7%. This is because a retrofitted home is more resistant to damage from earthquakes, making it a more attractive investment for potential buyers.
Can I stay during retrofitting?
- Most work allows occupancy, but some phases may require temporary relocation. In most cases, you can stay in your home during retrofitting. However, there may be certain phases of the project that require temporary relocation. For example, if the foundation is being repaired or reinforced, you may need to move out for a few days or weeks. Your contractor will be able to advise you on whether or not you will need to relocate during the retrofitting process.
How often should I reinspect?
- Professional inspection every 5 years, personal checks bi-annually. It’s important to regularly inspect your home after it has been retrofitted. A professional inspection should be conducted every 5 years to identify any potential problems. You should also conduct personal checks bi-annually to look for signs of damage or deterioration.
Case Studies
- The Anderson Family: The Anderson family lived in a 1950s bungalow in Los Angeles. After experiencing a minor earthquake, they decided to retrofit their home. They started with foundation bolting and cripple wall bracing, then reinforced the walls and roof. During a subsequent earthquake, their home sustained minimal damage, while their neighbors’ homes suffered significant damage.
- The Garcia Residence: The Garcia family owned a historic brick home in San Francisco. They were concerned about the vulnerability of their unreinforced masonry walls. They hired a contractor to reinforce the walls with steel and epoxy. During an earthquake, their home remained standing, while many other brick buildings in the neighborhood collapsed.
Biblical Context
The Bible speaks extensively about the importance of building on a strong foundation. In Matthew 7:24-27, Jesus tells the parable of the wise man who built his house on the rock and the foolish man who built his house on the sand. When the storm came, the wise man’s house stood firm, while the foolish man’s house collapsed. This parable illustrates the importance of building on a strong foundation, both literally and spiritually.
“Therefore everyone who hears these words of mine and puts them into practice is like a wise man who built his house on the rock. The rain came down, the streams rose, and the winds blew and beat against that house; yet it did not fall, because it had its foundation on the rock. But everyone who hears these words of mine and does not put them into practice is like a foolish man who built his house on sand. The rain came down, the streams rose, and the winds blew and beat against that house, and it fell with a great crash.” - Matthew 7:24-27
Expert Insights
“Seismic retrofitting is not just about protecting your home; it’s about protecting your family and your community.” - Dr. Lucy Jones, Seismologist. Dr. Jones emphasizes the importance of taking proactive measures to reduce the risk of earthquake damage.
Additional Resources
- Local Building Department
- Structural Engineers Association
- Earthquake Safety Organizations
- FEMA Guidelines
Remember: While earthquake-proofing can seem daunting, even modest improvements significantly increase your home’s resilience. Start with the most critical vulnerabilities and progress systematically through your strengthening plan. Don’t delay in taking steps to protect your home and family from the devastating effects of earthquakes.
Conclusion
Earthquake-proofing your older home is an investment in your family’s safety and security. While it may seem like a daunting task, by understanding your home’s vulnerabilities, implementing strategic upgrades, and taking non-structural precautions, you can significantly reduce the risk of damage and injury during an earthquake. Remember to prioritize tasks, select cost-effective materials, and comply with local building codes. And don’t forget the importance of regular maintenance and monitoring. With careful planning and execution, you can make your home more resilient and protect your loved ones from the devastating effects of earthquakes. And, most importantly, remember that while we take these practical steps, our ultimate security rests in God.


